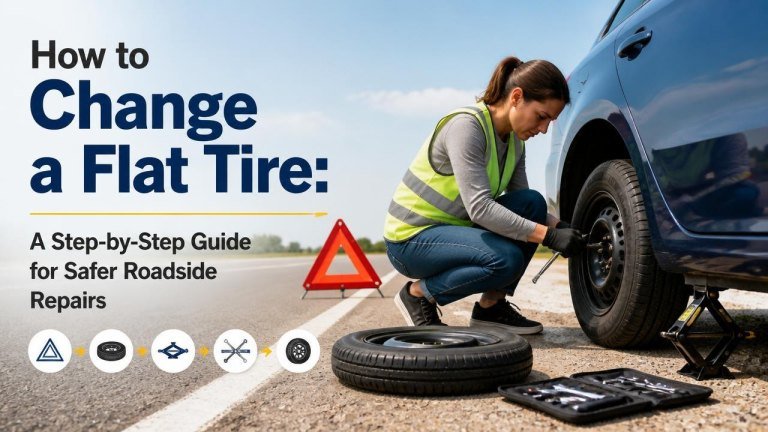
A flat tire can happen without warning, but knowing what to do can make the situation safer and less stressful. With the right tools, a stable vehicle, and a careful approach, many drivers can replace a flat tire with a spare.
Before You Begin: Prioritize Roadside Safety
Your first priority is not the tire—it is your safety. Move the vehicle as far away from traffic as possible and stop on a firm, level surface. Turn on your hazard lights, apply the parking brake, and ask passengers to exit on the side away from traffic if it is safe to do so.
Do not attempt the repair on a narrow shoulder, in moving traffic, on soft ground, or on a steep incline. If you cannot reach a safe location, the tire is damaged severely, or conditions are dangerous, call roadside assistance and remain in a protected area away from the roadway.
Check Your Tools and Replacement Tire
Before lifting the vehicle, confirm that you have the necessary equipment. Most vehicles include a spare tire, a jack, and a lug-wrench, but their locations vary. Check your owner’s manual for the correct jack point and the proper storage location.

- Spare tire or temporary-use tire
- Vehicle jack and lug wrench
- Wheel chocks or solid objects to help prevent rolling
- Gloves and a flashlight, especially at night
- Reflective clothing or warning devices where appropriate
Inspect the spare before installing it. A temporary spare should have adequate air pressure and must be used only according to the vehicle manufacturer’s instructions. Never rely on a damaged or visibly underinflated spare.
How to Change a Flat Tire Step by Step
1. Secure the Vehicle
Put the transmission in park, or select first gear or reverse in a manual vehicle. Switch off the engine, set the parking brake, and place a chock in front of or behind a tire that will remain on the ground. Keep people clear of the vehicle while you work.
2. Remove the Hubcap and Loosen the Lug Nuts
If the wheel has a hubcap or decorative cover, remove it carefully using the tool provided or a suitable edge designed for that purpose. Before raising the vehicle, use the lug wrench to loosen each nut by turning it counterclockwise. Apply steady pressure rather than sudden force, and leave the nuts in place for now.
Loosening the nuts while the tire is still on the ground provides stability and helps prevent the wheel from turning. Do not completely remove them at this stage.
3. Position the Jack Correctly
Find the designated jack point described in the owner’s manual. It is usually located near the flat tire along the vehicle’s reinforced frame or rocker-panel area. Position the jack on solid, level ground and make sure it is seated securely before lifting.
Never place the jack under random suspension components, body, or exhaust components. A poorly positioned jack can damage the vehicle or cause it to fall.
4. Lift the Vehicle
Raise the vehicle slowly until the flat tire is just clear of the ground. The jack should remain vertical and stable as it extends. If the vehicle shifts, stop lowering it and reassess the surface, jack position, and parking brake.
Keep your hands, feet, and body out from underneath the vehicle. A jack is designed for lifting, not for supporting a vehicle while someone works beneath it.
5. Remove the Flat Tire
Finish unscrewing the loosened lug nuts and place them somewhere clean so they do not roll away. Pull the wheel straight toward you. If it is stuck, tap the tire’s sidewall gently with your foot while maintaining a stable stance; do not strike the rim with excessive force.

Set the flat tire aside without placing it in the roadway. If there is enough room and it is safe, it can be positioned near the vehicle as an additional precaution against rolling, but it must not interfere with the jack or traffic.
6. Install the Spare Tire
Align the spare wheel with the wheel studs or hub and push it fully into place. Thread each lug nut by hand, turning it clockwise. This helps prevent cross-threading and ensures the wheel is seated correctly.
Tighten the nuts in a diagonal or star pattern until the wheel is snug. Do not fully tighten them while the tire is suspended, and do not use excessive force that could cause the vehicle to move.
7. Lower the Vehicle and Tighten the Lug Nuts
Lower the vehicle carefully until the spare tire touches the ground and cannot rotate freely, then remove the jack if appropriate. Use the lug wrench to tighten the nuts in a star pattern, alternating across the wheel rather than moving around it in a circle.
Use a torque wrench if one is available, following the specification in the owner’s manual. Correct lug-nut torque helps keep the wheel secure without damaging the studs or brake components.
8. Replace the Equipment and Check the Tire
Store the flat tire, jack, lug wrench, and other equipment securely. Check that the spare is firmly installed and that no tools remain near the pedals or under the vehicle.
Drive cautiously to a safe place where the tire can be inspected or repaired. A temporary spare may have limits on speed, distance, and road use, so follow the markings on the tire and the vehicle manufacturer’s guidance.
What to Do After Installing the Spare
A spare tire is often a temporary solution rather than a permanent replacement. Have the original tire inspected as soon as practical. It may be repairable if the puncture is in a suitable area and the tire has not been driven while severely underinflated, but a tire professional should make that determination.
After driving a short distance, recheck the lug nuts if the manufacturer’s instructions recommend it. Also monitor for vibration, pulling, unusual noise, or a change in handling. Stop safely and seek assistance if any of these signs appear.
Common Mistakes to Avoid
- Changing a tire too close to passing traffic
- Using a jack on soft, uneven, or sloped ground
- Working underneath a vehicle supported only by a jack
- Installing a spare without checking its condition
- Forgetting to loosen the lug nuts before lifting the vehicle
- Tightening the lug nuts unevenly or with excessive force
- Driving farther or faster than the spare allows
Taking a few extra moments for safe positioning, careful lifting, and even tightening can prevent avoidable injuries and vehicle damage.
When to Call for Professional Help
Call roadside assistance or a qualified professional if the vehicle is in an unsafe location, the jack or spare is missing, the wheel will not come off, or you cannot identify the correct lifting point. Professional help is also the safer choice when weather, darkness, traffic, or physical limitations make the repair risky.
A tire change should never put you in greater danger. If the situation feels unsafe, prioritize personal safety and wait for assistance.